If you’ve ever opened a template and thought ‘why is this so messy?’… yeah, same. This one’s cleaner.
Retro VHS | For Premiere Pro is a logo reveal built for Premiere Pro. You don’t need a complicated explanation: Retro VHS | For Premiere Pro gives you a structured starting point, then lets you customize the parts that actually matter—timing, colors, text, and placement.
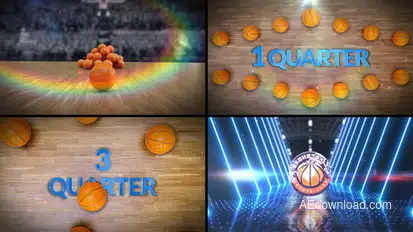
Resolution: 3840×2160. (Yes, those specs actually matter when you’re matching a client brief.)
 Title Title |
Retro VHS | For Premiere Pro |
 Type Type |
Logo Reveal |
 Category Category |
Logo Stings |
 Compatible with Compatible with |
Premiere Pro CC |
 Resolution Resolution |
3840×2160 |
 File size File size |
16mb |
 Files included Files included |
Premiere Pro Project Files, Motion Graphics Template Files |
 Published Published |
October 23, 2023 |
Preview Video
Preview video (kept exactly as provided):
Where it fits in your workflow
In a typical timeline, you’ll use this kind of asset for the ‘glue’ moments: transitions between shots, quick label cards, or that little punch of motion that keeps viewers engaged.
In a typical timeline, you’ll use this kind of asset for the ‘glue’ moments: transitions between shots, quick label cards, or that little punch of motion that keeps viewers engaged.
Customization
Customization is straightforward: replace placeholders, adjust easing/timing, and update colors. If your footage is dark or high-contrast, a small color tweak can make the motion feel intentional.
Most editors overthink this step. Don’t. Start by matching the asset to your typography and colors, then fine-tune duration so it breathes with your cut.
Quick customization checklist
- Swap placeholders (footage, logos, text) and keep names tidy.
- Match colors to your brand palette—especially for overlays and titles.
- Adjust duration so it matches the rhythm of your cut (fast ads vs. slower explainers).
- Do a short test export before committing to the final render.
- Save one ‘master’ version, then duplicate for variations.
How to use it (step by step)
Test with a short clip first, then apply it to your full timeline once you like the look.
- Download the archive from one of the mirrors below.
- Extract it using WinRAR or 7-Zip into a simple folder path.
- Open Premiere Pro and import the project/template files.
- Let it load once (first open can be slower), then replace placeholders.
- Render a short preview, tweak timing, then export the final version.
Tips for cleaner results
- Keep your folder paths short (C:/Projects/PackName). Long paths can cause missing links on some systems.
- Do a 10-second test export first. It catches missing fonts and broken links before you waste time on a full render.
- If preview is choppy, drop playback resolution or use proxies. Your eyes don’t need full quality while you edit.
- When something looks off, it’s usually timing. Nudge the keyframes a little and it suddenly feels ‘yours’.
Rendering & performance
Color-managed pipelines (Log footage, LUTs, etc.) can change how overlays look. If needed, place the asset above your adjustment layer to keep it consistent.
If your project is heavy, pre-render the segment that uses the template and continue editing with the preview file. Old-school trick, still works.
Troubleshooting
Templates are usually simple. The problems come from paths, versions, and missing fonts—so here’s the quick fix list:
- If the project opens with missing media: re-link from the extracted folder. It’s almost always just file paths.
- If fonts look wrong: install the fonts first, then restart Premiere Pro. Fonts don’t always refresh until a restart.
- If import fails: the download may be incomplete. Try another mirror and re-extract with 7-Zip.
- If playback is slow: proxies + lower preview resolution. It’s not glamorous, but it fixes 90% of ‘lag’ complaints.
FAQ
Can I use it commercially?
Licensing depends on the original source. If you need commercial usage rights, use the correct license for your workflow and client agreements.
Will it work on older versions?
Older versions may open with warnings. Updating Premiere Pro is the safest way to avoid missing features or broken expressions.
Do I need plugins?
Most assets are usable without extra plugins. If something requires a plugin, it’s typically mentioned in the details section or inside the project notes.
Real-world note
I’ll be honest: the fastest way to make any template feel ‘custom’ is to match it to your footage. If your shots are warm, nudge the colors warmer. If your edit is sharp and punchy, tighten the timing. That tiny bit of attention makes Retro VHS | For Premiere Pro stop looking like something you grabbed five minutes ago.
Also—keep your assets organized. One folder per pack, one backup copy, and clear naming. It’s boring admin work, sure, but it saves you from the classic ‘where did I put that version?’ panic when a client asks for changes right before delivery.
Download
Use the mirrors below to download Retro VHS | For Premiere Pro. If one mirror is slow, try another.
oppenit.com
katfile.com
pixeldrain.com
prefiles.com
fileblade.com
1fichier.com
gofile.com
nitroflare.com